Showing posts with label tips. Show all posts

Thursday, April 25, 2013

Working in the Lines

Since I am not riding at the moment, Harley and I have been doing most of our work in the lines: one or two.  On afternoons after work I usually lunge him and save the long line sessions for the weekend when I have more time.  Harley has been working like a champ.  Yesterday, I lunged him and he demonstrated his skills for a barn-goer who was interested in the art of lungeing.  Harley did all his transitions from verbal commands and stretched his head to the ground with this lovely springy trot.  He got compliments for being so obedient and relaxed.  Thinking back to how he used to motorcycle around me on the line and could not handle the balance to canter a circle that small, I realized that he has come an amazingly long way.  I never really considered him a model lungeing horse, but I guess he had other plans!

This past weekend we returned to the long lines for the first time since the failed experiment of raising the lines to the upper rings.  Thankfully, the experience had melted away and he had no resentment for the lines now comfortably placed in the middle rings on the surcingle.  We got right to work with some nice walking and stretching into the bridle.  I love how the long lines allow me to warm up my horse with circles and straight lines, just as if I were riding.  I try to turn my hips and shoulders before using my hands to turn my horse.  It is a fun challenge to see how little I can do and Harley understands.

In the walk, most of the changes of direction are relatively easy, but the trot is a whole 'nother thing.  I cannot allow Harley to trot straight ahead for very long, because I am walking with him.  My lines have to be organized and my hands nimble for clear communication.  Most of the mistakes that I make in long lining come from the lines getting too long or too short and trying to manage the whip.  I absolutely hate catching my horse in the mouth, because I didn't manage my lines properly or turn him soon enough to prevent myself from getting left behind.  His expression tells me that he understands that my intent was not to hurt his mouth or turn him rudely, but it still disturbs the flow of his work, which can be very nice.

I am trying to develop some strategies for effective long lining.  This is what I have so far:

  1. Give my hands separate jobs.  Keep excess line draped (not wrapped!) in one hand and the whip in the other.  The whip-hand is also responsible for re-draping extra line or letting more line out.  This is still not easy, because I have small hands and the whip gets heavy.
  2. Keeping the whip in my whip-hand (right), move the whip from one side to the other when we change direction.  This means that the whip is crossed over the lines when we are traveling right.  So far, this seems to be less awkward than trying to transfer the whip to my left hand, which is holding a bunch of line.
  3. Always have excess line available.  This is important if I need to let more line out so my horse has time to turn or so he can stretch.  This is also important if the horse jumps forward suddenly.  Thankfully, that is rare, but it is a possibility.
Long lining reinforces many concepts from riding and I really like how Harley and I can still share a connection through the bridle, but it is definitely a different art and has its own feel.  I am looking forward to finding ways to finesse our practice.

If you have any strategies to add to my list, please let me know!

Tuesday, March 12, 2013

Saving Money With Horses

Oxymoron, I know.

Lately, I have been thinking about how to save money.  This suits my nature more than making money, fortunately or unfortunately, and the distribution of wealth and the state of the economy has me really worried.  I am always concerned about those types of things, even though I try to avoid reading about them (my husband reads enough for both of us and fills me in).  I am pretty sure our economy is breaking in this country and this makes me think about my priorities:

Keep my family healthy and happy.
Keep my horse healthy and happy.

Oh yeah, and have I mentioned that we have one on the way?  ;)
This makes me think even more about how to save or cut costs.  Sometimes I wish that I was wired differently and looked for ways to make money instead.  Anyone want to buy Harley paraphernalia?

My husband and I are rather frugal people.  We are not penny-pinchers, but we are definitely not interested in dropping cash without good reason.  We do not splurge on things like restaurants or new furniture and we traded our cell phone contracts in for contract-free service (This saved us about $100 per month and we own our phones!).  When we first were married, we did not purchase cable television and hardly missed it for years.  My husband only buys his electronics on sale and uses his expertise to our advantage (i.e. He chose a wireless web camera instead of a baby monitor and saved a lot of cash.  Plus we can see the video from our phones or computers and control where the camera looks.  Have you seen how much baby monitors with a speaker and video screen cost?).  These are just a few small examples, but, in general, I think we do pretty well.

What is my single, greatest expense?  You guessed it.

My horse.  My beloved, Harley.

Priceless in my heart, but to my bank account, not so much.

I have tried to consider how I save money in the care and upkeep of my horse, but it is difficult.

My horse eats the most expensive food at the feed store (the extra cost is added to my board bill).  He is a hardkeeper and won't maintain on things that seem to work for other horses like Senior Feed (not really cheap, I know), alfalfa pellets (he won't eat them), lots of hay (hay is strictly rationed around here and, apparently, expensive), or air (if you have an easy-keeper).

I do not save money with regard to my horse's health.  He has regular veterinary and dental visits.  He has had extensive dental work done to compensate for a lack of care before I bought him and a severe overbite.  He is currently receiving immunotherapy shots for his allergies, which are not ridiculously expensive, however, I was spoiled for the first five years that I owned him and he did not require anything except routine vaccinations, so the allergy meds are a considerable new cost.  I suppose I save money by administering them myself, which is common practice.  If I had to pay for the vet to come out and give them every couple weeks, I would never be able to do it.

Sadly, I have wasted money on supplements trying to help my horse gain and/or maintain weight.  I now give him the bare minimum (ABC's Plus prebiotics/probiotics and Cough-Free) via SmartPak.  SmartPak seems to be the most economic way for me to get supplements into my horse on a daily basis.  I have wasted money on supplements in buckets and weight-gain supplements with rave reviews.  Bummer.  I am done with those.

My horse is boarded (full care), which is very expensive in New Jersey.  This is by far the greatest cost of horse ownership for me.  Yes, it is very convenient and private and the farm is less than 10 minutes from my house, but there are no bells and whistles (no heated tack room, no indoor arena, no bathroom, no special footing or sprinklers, no grassy pastures, etc.), which might surprise you if I revealed what I pay for full care.  Owning and maintaining a farm would be a huge expense too, of course, and I save there by boarding my horse (i.e. I do not need to own a tractor, manure spreader, truck, the land, etc.).  Our little and densely populated state has some of the highest taxes in the country (income, sales, and property tax).  I wish that I got some kind of tax break for boarding for my horse.

I keep my horse out 24/7 (also called pasture board), but, perhaps surprisingly, I do not receive a discount.  Obviously, I do not keep my horse out for financial reasons.

I trim my horse's feet, but I do not do this to save money.  I hesitate to even mention my horse's hoof care in this context, but I suppose that after purchasing my own supplies, I might come out on top.  Of course, then you have to ignore the time and energy required for me to trim his feet every three weeks or so.

I do own relatively inexpensive tack, so I guess that I save some money there, sort of.  My no-name bridle cost about $100 new and my saddle was purchased used, but was still expensive (Albion Original Comfort).  I love my saddle, but unfortunately it was not my first saddle purchase and I burned through some cash with an (also expensive) ill-fitting saddle that I had to sell at a loss several years ago.  That one hurt, but you just cannot compromise saddle fit.  Lesson learned.

One area where I feel that I might actually succeed at cutting corners is riding clothes and saddle pads.  I will wear my riding clothes until they are bare and "holy".  This includes boots.  When I buy new clothes and saddle pads, I buy them on sale.  Before online shopping, I used to raid the bargain box at our local tack store (One time I found a pair of bright, purple breeches.  They were awesome!).  My priority with saddle pads is that they do not affect saddle fit (thin, please) and they must be easy to wash in my machine at home.

Where do I save the most money?

This would not work for some equestrians, but my greatest savings is achieved by limited participation in lessons, clinics, and horse shows.  I only take lessons about six to eight times per year and I rarely enter clinics or horse shows.  If I do show, I only enter schooling shows.  I just cannot stomach entrance fees or expensive classes.  I know that this is an important part of riding for many equine enthusiasts, but I am just not in that camp.  I have also noticed that I get more out of lessons with a consistent instructor than I do at group clinics.  One of the last clinics that I entered was $350 for a weekend with a very-well known clinician.  This may not sound like a lot of money, but it was a lot to me.  Even though I was an eager student (for $350, you better believe I was eager!) and took notes furiously in the classroom sessions and made the most of every exercise in the mounted sessions, I still felt like I didn't come away with enough new information and insight to warrant the price tag.  The clinician actually had me do some exercises with Harley that I already practice and use with my own riding students.  She was surprised that Harley could do them so well (didn't have the heart to tell her he knew them already), but didn't really offer the next step.  I hate to admit it, but I was disappointed.  Now, I save my money for occasional lessons instead.  Sometimes I kind of long for the comradery and "show-off" factor of clinics.  Harley always wins the heart of the instructor and auditors, which can be a lot of fun!

Oh yeah, and I do not own a truck or trailer.  That definitely saves me money, but also makes the attendance of the activities described above more difficult (and more expensive since I have to pay for hauling.).

If showing and attending clinics were my focus in riding, these would be disappointing areas to cut.  A great deal of my horse's training is done entirely by me.  Our mistakes and short-comings are my own and our successes are mine, too.  Besides literally saving money, I find great reward in this independence.

How do you save money with horses?
Practical advice welcome!

Sunday, March 3, 2013

My Barefoot Horse: Stages of Trimming

Last weekend, I trimmed Harley's feet.  I worked on his front feet on Saturday and his hind feet on Sunday.  This is still a doable activity for me and also still very rewarding.  I am more grateful than ever for the hoof stand and the new, sharp rasp that my husband got me for Christmas.  I can take down excess hoof wall very quickly with that tool (a standard length rasp with handle covers on both ends).  I still need the shorter, Ladies' Rasp for the bevel.

Leaning over is not my friend right now, but squatting is fine and an excellent exercise for my body.  I squatted as much as possible while trimming Harley's feet and this protected my back and made my job a lot easier.  I switched from the left foot to the right foot periodically, to give both of us a rest.  I like to work each of my horse's feet in stages back and forth until both front feet are finished.  Then I move on to the hinds or trim them on a different day.

The Stages of My Hoof Trimming Process
(Please see the Disclaimer at the bottom of this webpage.):

Pre-Inspection: Look at all of my horse's feet and legs while he is standing in the aisle.  His limbs should be straight above each foot.  Note any flare at ground level or bulging hairlines at the coronet, if present.  In my experience with my own horse, a balanced foot that is trimmed often enough should not have flare or a bulging hairline.

Stage one: Take down excess hoof wall that is standing "proud" of the sole.  This includes the heels.

Stage two: Bring the toe back to the white line with a strong bevel*.  I use the foot as a guide rather than measure angles, but the rasp is at about forty-five degrees, if you are curious.

Stage three: Continue beveling the hoof wall from the toe to the quarters.  The bevel should be strong enough that no outer hoof wall (dark pigmentation in Harley) will touch the ground and most of the inner hoof wall (unpigmented hoof wall, also called the "water line") is also off the ground*. 

Stage four: Address the height of the heels in relation to the entire foot.  Carefully rasp away more hoof wall if the heels are standing above the live sole in the buttresses.  This used to also require that I scrape chalky, dead sole out of the buttresses, but I have not had to the that for quite some time now.  Bring the heels back so that there is a large surface area to distribute weight upon landing.  Bevel the dark, outer hoof wall at the heels and join this continuous bevel with the bevel at the quarters.  This is the newest addition to my trimming process.

Stage five: Inspect each foot and touch up any missed areas.  Smooth and round the edge of the bevel all the way around the hoof.  This can be down while viewing the bottom of the foot or by bringing the foot forward on a stand.  Excess flare at the quarters can also be removed in this way, but that has not been required in Harley's trims since I have started continuing the bevel all the way around the foot.

Stage six: Double or triple check the heels for balance in relation to the entire foot.  In general, the heels of the same foot should both have been brought back to the same point and the height of the heels should be the same as viewed from the back of the foot, looking across the entire foot as if you were viewing the lip of a drinking glass.

Stage seven: Trim the bars flush with the sole and any excess bar material next to the frog.  Treat the frogs, if necessary.  The constant wet and mud is not kind to frogs this time of year.

Post-Inspection: Repeat the pre-inspection.  My horse should be weighting his entire foot, back to front, and no outer hoof wall should be touching the ground.  Ideally, he is standing square and dispersing his weight evenly laterally and from back to front.  I take a step back and inspect the entire foot, limb, and horse periodically throughout the trimming process.  It only takes a second and keeps the whole horse in my mind, because each foot does not exist as an entity in and of itself!

*If there is any separation of the hoof wall from the laminae (white line), then I bevel to the white line.  This happens at the quarters in periods of fast growth when I am not trimming often enough to keep up with his need to weather hoof wall.  I try my best to avoid this by trimming more often in the spring and summer than I do in the fall or winter.

I did not take many pictures this time around, because I wanted to limit the number of times that I had to lean over.  I would have left my camera in the bag completely, but the heels on his front feet made me cheer with glee so I had to snap a picture.

Right front: Large weight-bearing surface at each heel.  This and the next photo were taken after "stage one".

Left front: The heel surfaces appear to have become larger since I started continuing the bevel all the way to the heels.

Left front, post-trim (oops! blurry)

Right front, post-trim

Put carrots here as needed (Harley encourages liberal, frequent applications).  Well-timed carrots foster good behavior and cooperation from your equine partner.  I will give a carrot during a break after he has stood nicely and waited for me to put his foot down.  If he is fidgety or takes his foot away, he does not get a carrot.  He is allowed to ask to put his foot down to adjust his stance.  I oblige him.  Sometimes he moves his foot a bit to show me that he wants it in a different spot (move the stand back, for example).  I am more than happy to work with him so we can both be as comfortable as possible.  For me, trimming is a lengthy process at about 15 minutes per foot working back and forth between the left and right.

Buddy Update: Harley and his paddock mate are back together again.  The mud has persisted, but the separation of friends has not.  I am very happy for both of them, even if they are making a terrible mess slopping around together in the mud.  Apparently, they were running and playing quite a lot.

Sunday, August 19, 2012

Blogger Question About Photo Storage

Update, 8/28/12:
I found this on one of Google's help pages. 

Free storage limits

Photos up to 2048 x 2048 pixels and videos up to 15 minutes won't count towards your free storage.

Automatic resizing

All photos uploaded in Google+ will be automatically resized to 2048 pixels (on their longest edge) and won't count towards your free storage quota.
All photos uploaded from the Picasa software or in Picasa Web Albums over the free size limit will count towards your 1 GB of free storage. When you reach your storage limit, any new photos you upload larger than the free size limit will be automatically resized to 2048 pixels (on their longest edge).

Source: http://support.google.com/picasa/bin/answer.py?hl=en&answer=1224181

----------------------------------------------------------

Original Post:

I was just updating my blog layout this afternoon, when I received a slightly alarming message from Blogger that read something like this:

"No more pictures for you."

Okay, not exactly.  What it really said was that my Picasa Web Album was full and I had exceeded the free storage space for photos.

There are different types of infinity, but, sadly, the internet is not one of them.

Eh, excuse me?

Then I proceeded to waste precious hours reading about the free storage available on Picasa (only 1 GB), which Blogger uses to store uploaded photos, and how I could purchase extra space for a monthly fee if I needed more room, and then I resorted to deleting as many photos as I could from my album (which I only use as a means to store photos for this blog).  This was a "beyond boring" way to spend my afternoon.  I really, really hope that I did not delete pictures that are included in my blog posts.  The album was not very user friendly, in my opinion.  It would have been really nice if the photos included information about where I was using them, but the only information that I could use to determine if a picture might be posted on my blog was the number of page views.  So basically, it was a big guessing game, which including looking through all of my posts since the beginning of time this blog in April 2011.  Apparently, Picasa continues to store all photos that were uploaded even if I did not actually publish them in a blog post.  There were many duplicates and sometimes a large number of page views were split between two duplicates (What does that mean exactly?).  I have reduced the used storage in my album to about 80%, but it is only a matter of time before I max it out again.

Dear Fellow Bloggers and Friends,

Is this a blogging problem that you have also encountered?
Do you have a solution to this problem?
Are you paying monthly fees for more photo space?

I love that blogging is a free and creative pastime.  I understand that web space is not really free and that Google is just extra-special-awesome for making so many things as close to free as they possibly can.  I already take advantage of many of these services: Gmail, YouTube, Blogger, and, I guess, Picasa, although I did not know that I was using the web album until today.  I am hoping that maybe there is an alternative to paying for more space, although I will admit that the fee for the next level is very small at about $2.50/month.


IMG_4821shrunk
Test photo shared from a new location.  Pay no attention to the parrot in the foreground.  This photo is supposed to be of Rapa the Wonder Budgie.

Friday, July 27, 2012

Riding Reflection: Dressage Test Prep

Although I do not love dressage for the competitions, I do see the benefits of entering the occasional dressage show and those benefits are reaped before we even load up to leave the farm.  Like many things in dressage, it is all in the preparation.

I wouldn't mind if Harley brought some of this on Sunday.

I have signed up to ride First Level Test 3 and Second Level Test 1.  We made it into the show ring for First Level Test 1 and Test 3 twice last year.  This is the first time either my horse or I will be entering at A for a Second Level test.  I am excited about this and I plan on taking both tests seriously, schooling show or otherwise.  I know that I have set us up for a challenge.  First Test 3 is not easy and we can certainly do much better than we did last year, but competition as it is, there are no guarantees and even though the test feels easier now, First Test 3 is not a picnic.  Despite this, I am still motivated to try Second Test 1.  Practicing for these tests is already showing me some things that I would not have learned if I had not signed up for the dressage show.

For example, I must not override my horse.  What I mean by this is, I must not go out there and let determination exude from me in the form of a heavy seat or aids.  I must not lean back or against his motion.  I absolutely must ride my horse and be there for him, rebalance him, ask him to meet the challenge, but I cannot ride him like he is a Grand Prix horse.  This totally squashes his movement.  I did this by accident a few days ago.  I went out to practice the Second Level test with minimal warm up, so that I could see what we could do without much prep, and I overrode.  Harley tried to comply, but the result was that impulsion suffered, his movement died down, and his right lead canter threatened to be four-beat.  He could not canter a 10 meter circle without breaking to trot and when I tried the counter canter loop he threw his head up and shook it from side to side in total irritation.

"Seriously, woman?"

Oops.

At least I learned that one early on.  I went back and let him go forward.  I let him stretch in the canter and we got our rhythm and impulsion back.  I found out that he was much more likely to canter a nice 10 meter circle if I sat light, let him have a little lower neck, and just nudged my outside heel at the beginning of each stride.  I have to trust him.  I cannot be the horse.  That is his job.

 Another thing that I learned is exactly what we need to do in the warm up to prepare.  When I prepare for a dressage test, I spend time practicing the warm up.  When you go before the judge, there are no do-overs.  You get one shot to show-off each movement, so you better be prepared before you enter the arena.

My Warm-Up Plan:
After as long a walk warm up as I can fit in the time schedule, begin with forward in trot.  Keep the reins long and give Harley an opportunity to stretch and go with as long a frame as he wants.  He does this nicely at home, although the show grounds may be too exciting to get the same relaxation, but I will still give him the opportunity.  Go large and round off all the corners.  Ride big circles and changes of direction all in rising trot, of course.  When he starts to flow, incorporate some walk transitions, keeping the reins pretty long and not asking for too much contact or collection.  The first goal is forward and relaxed.

Once forward and relaxed are there, we can start warming up flexibility and asking for more accuracy.  I will start riding smaller circles and smaller turns for changes in direction.  I can start asking for some leg yields and shoulder-in, still in rising trot, and walk transitions with a more positive connection.  I tried this a couple times this week and when he is ready to shift his balance back, he starts doing it on his own as the circles and turns get smaller.  Once he starts offering that shift in balance, I can sit a little taller, take up some slack in the reins and start riding him into the corners.  I must remember to ride several 10 meter circles, as this will help him in the canter, as well as a couple trot-halt-trot and a reinback to two.

Before the canter work, I should ride some sitting trot to give him a chance to accept my seat.  I must try not to control the first couple canter transitions too much and keep the figures large until he feels like he is bending properly in the canter.  This is like the trot warm-up.  Change rein a couple times through trot and then work a few canter-trot-canter transitions on the circle.  This seems to really help him maintain impulsion in the canter and establish obedience to my half-halts.  I should also incorporate some changes in gait within the trot and canter.  A walk break should be thrown in as needed, too.

Our Personal Gauntlet:
Before we enter the ring, I must be sure to ride a couple simple changes and a counter-canter loop in each direction.  The counter canter loop in the First Level test is shallow, so I may just need to ride that one once in each direction and save the more difficult loop for the Second Level test.  I was concerned about the simple changes, because Harley and I have never practiced them before.  We have trained canter to walk and walk to canter, but always on the same lead and the canter to walk was still a challenge and inconsistent for us.  So it was a happy surprise, when the simple change seemed to click for Harley this week.  This is perhaps the only time that I need to really sit on him in the canter.  The transition is not perfect, but some feel quite nice and he now seems to understand the purpose of the whole thing since we change leads after the walk.  I walked in to the test worried that we would blow these and now I see them as a welcomed chance to rebalance and breathe for a couple walk steps amidst what seems like a grueling canter tour.  The simple change is actually easier for us than the 10 meter canter circle, which I am considering riding a little large on purpose.  If we lose the rhythm or he becomes fatigued because the circle is physically challenging, we may sacrifice the rest of the test, so sacrificing a couple points for the circle is preferable.  And then there is the counter canter...

The counter canter is, by the way, the most valuable schooling experience that has come out of these test preparations.  Why haven't I been schooling counter canter?  I write time and time again that my horse likes to flying change at will and I have been struggling with this as both an obedience issue and a rider effectiveness issue and now I see what I should have been doing to help both these problems.

The counter canter.

Oh my goodness.
What an obedience challenge.
What a rider effectiveness challenge.
I now see the light.

My first attempts at the counter canter loop were utter failure.  Harley and I made every mistake.  Head-tossing.  Flying changes (nice ones, too).  Breaking to trot.  Physical tension and a lack of attention and submission.  I almost canned the whole thing right then.  I was not sure that there was any way that we could fix these problems before Sunday.  But the good news is that attempting this exercise forced me to address some issues that I have been too lackadaisical about.  As far as I can tell, our difficulties with the counter canter were almost entirely mental.

Well, maybe 90% mental and 10% physical.

Pretty, but not easy to tame.  Keeping my butt in the saddle would be a start!

Harley can counter canter.  Believe me, he can counter canter.  He demonstrates this sometimes when he flying changes onto the outside lead.  He can even do this on a circle and will continue along in counter canter.  He is a show off.  But that whole desire to show off is an obedience issue.  When I asked him to counter canter a loop at E or B, he did not believe that I wanted to canter on the "wrong lead".  I kept my aids the same, I did my best not to shift my weight, but he would still blow through my outside aids and switch leads.  If this did not work, then he broke to trot and changed leads.  Would you believe that I do not drill flying changes?  In fact I have not asked for a change since June.  I made the decision to get to his mind and convince him to let me do the thinking.  It was the only way that I could see us completing the exercise.

So I went back and repeated the exercise.  I did not try the loop, I just tried counter canter.  A diagonal, a half circle, whatever, it didn't really matter what shape.  I kept my aids absolutely on, without overriding (not too tight or too heavy!), and I kept looking into the inside bend.  If Harley did anything other than maintain gait, I told him "no", turned him around and went back to the beginning of the exercise.  By the fifth repetition, I felt discouragement creeping in, but I shoved it back.  I have faith in my horse.  If I can just convince him that I truly want him to canter on the wrong lead, I know that he can do it.

It might have been six or seven repetitions, but he finally complied.  I felt him shift his weight back, maintain the bend and the original canter.  As soon as he came around the turn, I stopped him and praised him with a long rein and the end of our ride.  I wanted him to know that what he had just done made me just as happy as any flying change.  I needed him to remember that.

And wouldn't you know it, two days later we rode again and he remembered.  This time on the first try.  He even stayed relaxed with those cute little snorts on the exhale at the end of each canter stride.  I stopped him again and praised him like crazy.  By the end of our ride, we managed the three-loop serpentine with no change of lead in both directions.  This exercise is very tough and very new for us.  I can feel that if I push too much he will break to trot.  The turn between the second and third loop is fragile and I believe physically difficult, so I have to ride carefully.  I cannot promise that we will pull it off at the show; there are just too many variables and maintaining relaxation and obedience will be more difficult away from home, but at least I know that we have it in us.  And when we return from our adventure, I believe that we will be well on our way to more obedience in the canter and improved rider effectiveness.  If I had not been forced to try it, I may not have taken the stand for obedience and the clarity of my aids.

Harley's mind is his greatest talent and my greatest training challenge.

All in all, let's hope for a safe trip and nice weather on Sunday.  The test preparations have already made me happy with my decision to enter this fast-approaching competition no matter the scores which should follow.

Wednesday, July 18, 2012

My Barefoot Horse: Hoof Stand Progress


I am getting better with the hoof stand.

Taking pictures while using the hoof stand is another story.

After my initial frustrations with trying to use the Hoof Jack, I sought out professional help.  Even though I trim Harley's feet, our barn still has a regular farrier that takes care of most of the other horses.  He happened to be around shortly after I last wrote about my failed attempts to use the stand for trimming.  Although, he was not familiar with using the cradle, he did give me some very helpful pointers:
  1. Raise the post so that you have to lift the horse's foot onto the post.  I had set the post too low.  After practicing with his stand, which is a standard metal farrier stand with no height adjustment, I set my post to the same height as his stand.  This is about at the level of my knee.
  2. Use your knee to lift the horse's hoof onto the post.  This was a simple, but very helpful tidbit.  I watched him lift my horse's foot using his knee and hands.  This also leaves one hand free if you need to move the stand a little bit for the best placement of the hoof.  After watching, I was able to imitate his technique.  What a difference!
  3. Always keep at least one foot on the stand, so that the horse cannot topple the stand or knock it onto you.  Enough said.  Good advice.
The farrier also showed me how to hold the horse's feet with my legs, so that I can use both hands to trim.  I have tried this many times, but I just cannot do it.  The hoof slips off my thigh like it's been greased.  I just can't seem to find a placement that keeps the foot on my lap and the weight of the hoof hurts my legs.  This is not a muscular fatigue hurt; it's a crushing, "I am going to get a bruise on my thighs" kind of hurt.  I have Princess and the Pea issues, so it is probably my wimpy skin complaining.  Anyway, it was nice of him to show me just the same.  And he gave me an old pair of farrier chaps, so that I do not have to worry about ruining my breeches anymore.  That was a major bonus! 

Thank you for all of your help and advice, Mr. Farrier!

Once I had used the stand to finish the top of Harley's feet, I got more comfortable with the idea of trying the cradle again.  My friend said that she tried it and her horse stood very nicely.  She said that it was much easier to trim his feet using the cradle, so I decided to give it another shot.

And you know what?  It worked.

I tried keeping the stand a little higher, even with the cradle, and Harley was much better about keeping his foot in the stand.  I tried using my knee to steady his foot as I trimmed the bottom and that worked, too.  The trim was completed in a little more timely fashion and I did not have to keep putting my horse's foot down to take breaks.  I definitely felt less tired when his front feet were finished.  By the time I got to his hind feet, I had found a way to steady his foot in the cradle so that I could use TWO hands (that's right, I said two hands) to work the rasp.  In over two years of trimming, that was a first.  YES!

Harley is usually a good boy, but he was super good for his hind feet.  I think that he actually got to liking the stand.  He stayed relaxed and did not mind keeping his foot in the stand for much longer than he lets me hold it on my own.  I was pretty amazed.

Harley and his new friend.

Three weeks of growth has proven, once again, to be bordering on too much time between trims in the summer months.  Harley's outer walls started to crack a little bit and the white line at the toe became wonky.  Thankfully, this is a minor hiccup that does not affect his soundness.

Just needs to be finished from the top with my new stand!

Right front wonkiness.

Left front to match.  The hinds had something similar going on.

I just rasp up to the white line to relieve the pressure at the hoof wall and keep the toe short.  The issue should resolve itself by the next trim as long as I do not wait too long to pick up the rasp.  This sort of thing tends to happen in the summer and confirms to me that I cannot leave him to self-trim.  Despite 24/7 turnout, we just do not have the variety of terrain to take off enough hoof without my help.  Even riding him almost every day (which I have not been able to do this year do to severe weather and heat, but I have done in previous summers) does not make much of a dent.  He just grows even more hoof!

Tuesday, June 19, 2012

My Barefoot Horse: If Wishes Were Hoof Stands (Advice Requested)

Harley is not impressed by the inedible hoof stand.

The Hoofjack has been long-listed on my wishlist for several years now.  The stand is expensive and not totally necessary, so lots of other things ranked above it on the "must buy" list.  Since I have not come into a large sum of money or won the lottery, how, you ask, did I come into hoof stand ownership?

By co-ownership! 

I own 1/3 of the stand!  That's right.  The barn owner, another boarder who grooms her horse's feet, and myself all chipped in and purchased the real thing.  Split into thirds, that cost is very doable.  My fellow boarder and I were vacillating over a cheaper version in a catalog, but were hesitant to risk using an imitation.  When the barn owner expressed interest in purchasing a stand, we cheered and jumped at the opportunity. 

The Hoofjack is very well-designed, durable, and safe.  The cradle and pillar are very easy to switch between and the height is adjustable.  Can you see the circular magnet on the side of the stand?  Those heave-duty magnets allow me to never put my rasp on the floor.  This is also nice, because I do not have to reach all the way to the ground to pick it up again either.

At first glance, this seems to be a hoof stand match made in barefoot-trimming-heaven.  The only problem is that there seems to be a learning curve involved with using the stand.  The first time that I attempted to use it, I completely gave up and put the stand aside.  When Harley's foot was resting in the cradle, it felt too wobbly as I tried to trim.  I tried pressing his foot into the stand to stabilize it, as I have seen on videos, but the results were not much better.  Harley also seemed less patient with the stand than he is with just me.  He pulled his foot out of it several times.  I found myself feeling kind of annoyed, because I did not want to have to train him to keep his foot in the stand.  It is unusual for me to balk at a training opportunity, but trimming is hard work and I felt an overwhelming need to "just get it done".  My perspective was that the stand was interfering with my work.

It appears that wishes are not without irony.

Since my first attempts, I have used the stand to finish his foot from the top with some success.  The stand is thousands of times better than using brute strength and my back for finishing off the mustang roll and shaving off any remaining flare at the quarters and back of the foot.  However, I am still playing around with the optimum height. 

When I do use the stand, Harley seems to want the stand set very low.  This is not a surprise since the previous stand that I used was, quite literally, my knee.  Actually, I find using my knee comfortable for my back when I am working on the bottom of the foot.  I can keep my back straight, by bending my other knee so that my shin is nearly parallel to the ground.  It is a squatting/kneeling position of sorts, which I have perfected over the past two years.  Now I fear that the stand will not be able to match this comfort or the secure feeling that I have cradling his foot between my hands and knee.

Any advice from those who successfully use and love their hoof stands?

Silly hoof stand.  Carrots are for horses.

Wednesday, June 6, 2012

Dressage Homework #4

This is the last homework assignment from our June lesson. 
I hope to see my teacher again in July!


Do the "untwist"!
Going to the left, I need to practice the following exercise:
  1. Rotate to the outside of the circle.  My right shoulder must not be visible from the center of the circle.
  2. Raise my left hand and make sure that I have not tilted my wrist.  For this exercise, a dead giveaway is the placement of my whip.  It should hang vertically in front of my knee (Whoa.  Talk about instantaneous feedback.  My whip was very informative after I realized where it should be.)
  3. Stretch my right elbow back.
  4. Bend both elbows and let my lower arms float up.  Imagine that they are filled with helium, but my elbows are heavy with cement.  I should be able to jiggle the bit in the CORNERS of my horse's mouth, not against the bars of his jaw.  Holy Mackerel, did that make him light in the hand!

Before the exercise, I am collapsing left.  My left shoulder is lower than my right, although Harley is still looking nice.

Untwisting to level my shoulders: I could turn my shoulders out and pull my outside elbow back even more.

My wrists are softly rounded toward one another and there is a nice bend in both my elbows now.  My shoulders are very near level.  I am really concentrating, as evidenced by the funny face I am making!
 
Now while I am trying to do all those things, I also must remember to let my lower legs hang down and move with my horse.  My seat must stay "plugged in" from back to front.  AND my shoulders must stay down and my shoulder blades open.  Let me repeat.

There must be space between my shoulder blades
at all times! 

If I get lost, I can make space between my shoulder blades by sticking my elbows out to the sides like wings.  Silly, I know!  But it works.

I found this really tricky to master while letting my lower arms float up.  I wanted to raise my entire arm, but that was incorrect.  And just when I would have it, my whip would fly back behind my knee or my lower legs would stop moving or I started leaning forward, dislodging the back of my seat or my outside seat bone!  Let's just say that throughout the lesson there were many, many do-overs and many chances to laugh at myself.  What else could I do?

It is much easier for me to remain level going to the right, even in canter.  There is a nice bend in my elbow and a straight line to the bit.  I might be told to raise my lower arms more, but at least my shoulders look pretty released and my torso is hovering in the middle.

I am so grateful to have a teacher who emphasizes correct bio-mechanics rather than just "mechanics" in riding.  There is a definite difference.  Although she teaches the importance of contact and forwardness, she never tells me to drive my horse into my hand.  In fact she rarely mentions things like bend or half-halts, always correcting my position when things go awry and then Harley re-balances himself.  Her instruction is applicable to all types of riding and her students are a diverse group with all types of saddles and horses.  She is an incredible, compassionate teacher, but also very firm in her convictions.

Oh and she is also willing to teach in the rain! 
How did we get so lucky, Harley?

If you remember the preview post...

...so what about his feet?
After our lesson, many "thank you's" and payment, my teacher asked about Harley's feet.  She knows the young woman who was my original barefoot trimmer and asked if she was still taking care of Harley's feet.  I took the plunge and confessed that I trim his feet myself.  She was surprised and asked how long I have been doing so (about two years).  She told me that she was very impressed and commended me on taking good care of his trim.  She has mentioned on separate occasions how he has such nice short toes.  Yippee!

Tuesday, June 5, 2012

Dressage Homework #3

The series continues...I have a lot of homework!  
Hopefully these posts will help me remember everything.


Use my good side to help train my weak side.
Since we are doing so well going right, my teacher encouraged me to ride a couple circles to the right to find the feeling and then go to the left.  Only stay on the left circle once and then return to the right to reestablish "north".  If I was really having trouble finding or keeping the straightness in my body, then she suggested that I only travel to the left for half a circle before returning to the right.  I thought this was some interesting advice.  I have read about the importance of not only riding your horse on his easier side.  This does nothing for his more difficult (stiffer) direction.  But what if your horse's easier side happens to be his "stiffer" side?  Harley is not really stiff going right, but it is his "stiffer" side.  He is flexible enough when traveling right, but the real strength is that he is more easily made straight.  The left side is his more bendy side (and my more bendy side!).  In fact, it is too flexible, which makes if very easy for both of us to collapse.  This makes his left side the more difficult direction to ride, because it is the more difficult direction to find true straightness.  He can fool me into thinking that it is easier, because he goes on the bit easily and flexes to the left more easily, but our balance is tenuous until we can align ourselves laterally.  Longitudinal balance follows shortly thereafter.

I have a strong habit of collapsing in the left direction.  It feels normal or comfortable to me when I let my left ribcage sink toward my hip.  This offsets my weight onto my right seat bone, which also feels normal to me and inviting to Harley to do a flying change onto the left lead if I happen to collapse left while in canter right.  This is more likely to happen on a straight line, which explains why he likes to throw those changes in on the long sides of the arena.  This also explains why it would be more difficult for him to flying change from left to right canter.  If I am collapsed left when I am hoping for the change, neither of us is in the right balance or position to do so.  My teacher explained that correct practice was the only thing worth our time.  Repeating several collapsed left circles would only serve to un-train Harley and my own body.  If I want to re-circuit my habits, I need to make every repetition as correct as possible.  Look to what we do well and use it to improve our left direction work.  She warned that "perfectionists" and dressage riders alike tend to focus too much on what is being done poorly, which is why she gave us permission to use the positive!

Monday, June 4, 2012

Dressage Lesson Homework #2

Welcome to a short homework series based on the things that I learned and worked on in my June 1st lesson with Harley.  I hope that you find some of our work helpful to your own riding 
or, at least, interesting to think about.

Imagine my torso as a folding-chair.
This one might take some convincing.  Collapse is a bad word in dressage and riding.  In fact, I will explain my own faults with regard to collapsing in a later post.  However, my teacher instructs me to "collapse" my front while plugged-in with my seat.  What does she mean?  I used to be a horrid hollower.  My lower back actually had a concave curvature.  This was partly due to prior training and partly due to my conformation.  When your back is hollow, your front-side is convex and over-extended.  No joint or muscle group in the rider should be at its endpoint: totally contracted/closed or totally stretched/open.  This inhibits movement at best, invites bracing from the horse at worst.  So my teacher treats my back like a joint.  I must keep that joint in its middle position, which is also called neutral and is necessary to ride in neutral pelvis.

By holding with my tummy muscles a little bit, I can "fold the chair", which is my torso.  This brings my shoulders over my feet without dislodging my seat.  This actually makes me straight in the saddle.  Although I am not a hollow-backed rider anymore, the tendency is always there for me.  Remembering to "fold the chair" keeps me right in the middle, making me a mobile, balanced person for Harley to carry.  I must remember to do this for every transition, up, down, or within gait, and even when we are traveling for periods of time at the same pace.  Toward the end of the lesson, I actually felt some fatigue in my torso, which is rare for me.  My teacher said that it could just have easily been muscles letting go as it could have been muscles working.


Sunday, June 3, 2012

Dressage Lesson Homework #1

Welcome to a short homework series based on the things that I learned and worked on in my June 1st lesson with Harley.  I hope that you find some of our work helpful to your own riding 
or, at least, interesting to think about.

Keep my wrists soft.
This is a common directive in dressage, but my teacher's way of explaining it is unique.  My thumbs should be on top, BUT my wrists should be "rounded" toward one another.  I know that this sounds weird, maybe even wrong, but it does not look wrong in practice and my horse's way of going improves.  If I can touch the knuckles of my right and left fists together while I am holding the reins, then I am holding them correctly.  My forearms form a "V" in front of my torso.  Have you heard the expression "hands together, horse together?"  I think of this when she instructs me to make this correction in my position.

My instructor revealed to me that I am more likely to tighten up my wrists going to the left, especially when Harley's motor starts to overpower his front end.  Next my shoulders come up, my shoulder blades squeeze together, and the spiral of imbalance continues from there.  I told her about pointing  my thumbs toward either side of the bit and she did not say that this was wrong, but she did change the position of my hands to what I described above.

Harley's response to this was to become lighter on his feet.  His head and neck also came up more and he could keep his neck longer while doing so.  He was also less likely to lean on the reins or fall forward, especially to the left.  This gave me more of a "working" forearm, as described by my teacher.  I guess my forearm wasn't working before.  ;)

Wednesday, December 28, 2011

Horses and Safety: Bring A Cell Phone

Thankfully, I did.

I went on a nonchalant trail ride with some barn friends this afternoon.  It was very windy and I requested that we keep it slow, because this would only be Harley's second ride since being well.  And we did keep it slow.  The ride was uneventful with minimal trotting and mostly walking along very familiar terrain.  Harley led for most of the trip and did a cute, little trail trot.  I could sit it like a cowgirl and pick our way around trees and puddles.  I did not want to foster an exciting atmosphere since the wind was kicking up and some horses find this tempting for naughtiness.  Somewhere in the second half of the ride, we switched position and a different horse was in the lead.  We all decided to trot and before we really got anywhere there was a thunder of hooves and a yell to stop.  Just as we halted I heard the characteristic thud of someone biting the dust.  Although I do not hear that sound very often, it always makes my hairs stand on end.  Is the rider okay?  Who fell?

I turned around to see that my friend behind us had fallen and this was a surprise, because she has the calmest trail horse in the bunch.  He is absolutely reliable and steadfast.  She was probably the last one that I expected to see on the ground.  Thankfully, all of us stopped our horses right away, so there was no danger of her getting run over and she was wearing a helmet (We ALL do, EVERY ride.).  Another friend was already off her horse and crouching over the fallen rider.  Meanwhile, I turned my horse to block her mount and grabbed his reins.

My friend on the ground was mostly okay, but reported that her ankle was hurt almost immediately.  I suggested that she just be still for a moment and rest before she moved.  You always want to take it slow, just in case something else is hurt.  After we all stood our horses and chilled out for a minute, she sat up and found that she could not put weight on her ankle.  Something was definitely wrong.

I have a nice little inside pocket in my riding jacket that is perfect for a cell phone.  I try to remember to always keep my phone in this pocket when I am working in the barn, riding in the ring, and especially out trail riding.  My previous riding jacket actually had the label "phone" on the same inside pocket.  I thought that this was a nice safety hint for anyone purchasing the jacket.

I handed my friend's mount to the dismounted rider who was assisting her and I pulled out my cell phone and thumbed through the contacts as quickly as I could.  I called the barn owner and, thankfully, she was still home.  We told her we were going out, so she knew that a call from me was probably an emergency.  After a quick explanation of our location, she drove the Gator out and picked up our friend, towing her naughty mount alongside the motorized vehicle.  We were fortunate to have been in a vehicle-accessible part of the trail and to only have to report a "minor" injury.  Of course, my friend did injure her right foot, which means that she cannot drive.  Let's hope that she suffered a bad bruise, rather than the other options.  Her family came to pick her up and take her to the doctor as soon as they made it back to the farm.

I highly recommend always bringing a cell phone when riding out on the trail.  I have heard a few things about the dangers of falling on one's cell phone or the horse being spooked by a ring tone, but I feel that both of these warnings are rare or avoidable: make like the movies and put your phone on vibrate!  It is important to have a means to call for help, whether it be from the trail or from the barn, because accidents can happen there, too.  Despite our careful, non-yahoo intentions, a fall still happened even on a relaxed trail outing.  There have been so many more exciting rides, with lots of trotting and cantering in a big group, that have ended without incident, so you never know when the unexpected could happen.  And sometimes the unexpected includes the quietest horse in the bunch kicking up his heels!

Our typical trail riding scenery: scrub oak and pine, sand, river stones, and usually deer.  This time we saw a red-tailed hawk lazily soaring in the air currents just above the tree tops.  We also heard the motors of four-wheelers in the background, but they never appeared on our trail.

Monday, October 31, 2011

Trailer Loading Horses: Does Free-Loading Float Your Boat?

At my barn, there is a lot of pressure to free-load or "float" your horse onto a trailer.  Years ago, a well-known Texas clinician, Chris Cox, visited our farm and demonstrated how to train an unloadable horse to walk onto a trailer by himself.  The horse was nervous and very resistant to enter the trailer, but after about thirty minutes of ground work and gradual steps up the ramp the horse was walking onto the trailer freely and standing quietly until he was asked to back up.  The demonstration was very impressive.  Mr. Cox's timing was what really got me.  He was always faster than the horse and always one step ahead of what the horse was about to do or think.  This Texan was brimming with experience and know-how.  Whether he was putting on the pressure or giving the release, he did both at precisely the right moment.  He also allowed the horse to determine the length of the training session.  This was not a fix-your-horse-in-thirty-minutes-or-your-money-back kind of clinic, but by the end of the training session, that horse just walked onto the trailer in a rope halter without any promise of hay or carrots and without a chain over his nose or a rope behind his hindquarters.  That got my attention.  I have always walked horses onto trailers by leading them and entering the trailer myself.  Mr. Cox insisted that walking onto the trailer with the horse was dangerous and unnecessary.  The barn owners were also impressed, so "floating" horses onto the trailer became the status quo.

When Harley entered my life, I taught him how to float.  Honestly, it was easy.  He was already good about walking onto a trailer, so I just taught him the cues to move forward and he walked onto the trailer.

Are we there yet?

Piece of cake.

Texas clinician: Eat your heart out!

I was actually born in Texas, so maybe some of the state's big britches and big talkin' has seeped into my blood for the short nine months of my life that were spent on Texas soil.

Free-loading or floating Harley into the trailer worked smashingly and was a crowd-pleasing trick.  However, on one occasion things did not go so smoothly.  I was trying to load Harley to go home after a show, but after he obediently walked into the trailer, he immediately backed down the ramp, stopping to stare at me at the bottom of the ramp.  I calmly repeated my request and he calmly repeated the yo-yo technique of entering and leaving the trailer.  After four or five yo-yo stunts, I became annoyed and was not in the mood to further entertain onlookers, so I took his halter and led him into the trailer by hand.  He walked on without objection and stood quietly while we raised the butt bar and snapped the emergency-release tie to his halter.  It was not until I walked around the trailer and went to close the last side door that I noticed him staring at me, following me with a forlorn expression.  I immediately worried that he was sick, but upon inspection of the hay cradle realized the problem.  Harley saw no reason to stand in a trailer with an empty hay cradle.  Oh.  There went my awesome trailer-training skills.  Looks like Harley had everything figured out, though.

Following the event, I spent some time re-schooling Harley to walk onto a trailer on his own, but I also never again forgot to check the hay cradle before giving my request.  Is that cheating?  The justification that I have developed for myself is that a 1000+ pound animal needs tangible motivation to walk into a narrow tin can.  I could use the strength of my will (and my whip) to motivate him, but I really do not want to.  Especially because I will never trailer him anywhere without hay and if he does need to enter the trailer in an emergency situation, I will most likely be walking him on anyway.  Okay, so there is my excuse.  Take it for what it is, I guess.

Excuse me!  Flight attendant?  I already finished my complimentary hay bag.
Can I have another?

Enter new step-up trailer.  I referred to this trailer in the post leading up to the October Dressage show.  All of the trailers which I had previously walked or "floated" Harley onto possessed a ramp.  I have heard many, many clinicians comment that horses prefer step-up trailers to ramps.  Something about the wobbly, angled nature of the ramp irks many horses.  They much prefer stepping up to the height of the trailer in one fell swoop.  I had this in mind as I walked Harley up to the new step-up.  The step-up was purchased for the barn owners to go camping with their horses, so we will probably rarely, if ever, need to load onto this trailer, but the barn owners are always willing to entertain a training opportunity, so I attempted to free-load Harley onto the step-up.

Harley marched up to the trailer with purpose and a raised neck.  I know my horse and he was looking for the telltale wisps of hay sticking out of the stuffed hay cradle.  Unfortunately for him, the trailer was brand-spanking new and had not yet seen the likes of hay, although a couple horses had practiced loading earlier in the day.  When Harley reached the step-up, his front legs gently bumped the foreboding step and he stopped, clearly perplexed.  He touched me with his nose and his eyes said,

"This thing is wrong.  I cannot walk."

I firmly grasped his halter and gave a supportive upward tug as I clucked, the cue which means, without a doubt, that he had not arrived at the correct answer to my request.  Having perched his front legs on pedestals before, he obediently stepped up into the trailer with both front legs.

"Goooddd Booyy", I cooed trying to ignore the lurking feeling that my attempts to float him onto the step-up were going to fall flat.

I allowed him to calmly step back down and then I repeated my request.  Harley stepped into the trailer and immediately stepped back down.  I praised him and immediately repeated my request.  He repeated his yo-yo stunt, but this time I did not praise him, instead I continued to cluck and swing the lead line at his hindquarters which meant "no backing up, Mister Harley."  He made a series of pathetic faces, sidestepped infront of the trailer, tried to pull back a few times and nearly forgot his manners by almost walking on top of me.  I responded to the last mistake by smartly swinging my line at his shoulder and muzzle which was enough to convince him that a "door" had not opened up between my shoulders.  We danced like this for a long minute, as the barn owner watched and I waited on bated breath for advice and suggestions to begin to fly.  Thankfully, none came and since I did not release the pressure or change my request, Harley plopped both front feet into the trailer and rested as I immediately silenced my body.

"Goooddd Booyy", I stroked his shoulder and looked at his face.  He was not licking and chewing and his expression said nothing short of "this sucks".

We stood there together for several minutes, me caressing and praising him, hoping to see him soften a hair and my horse waiting motionless, like a frozen circus pony glued to his post with a bad case of stage fright.

Like an obedient horse, Harley only stepped down when I gave his halter a little tug and clucked.  He freely stepped onto the trailer a second time, without any dancing, and assumed the circus pose until I requested that he come down.  When it felt like he knew the deal, I increased the pressure hoping to persuade him to continue walking forward and step up with his hindlegs.  He refused to budge forward.  I tried walking him from a distance to give him some momentum, but as soon as his front feet hit the trailer floor he froze.  My horse was decidedly confused and still had not changed his expression:

"This thing is wrong.  I cannot walk.  And this SUCKS."

To my relief, the barn owner chimed in that maybe I should walk on with him, so that he understood that he could step up with his back legs.  I was very happy to hear those words.  I felt like I needed permission to walk him on, since I was using the barn owner's equipment and working on their property.  Such is the case when you do not own your own farm.  Of course, there are many, many conveniences regarding not owning your own farm, so I am not complaining!

I eagerly bounced into the trailer and encouraged Harley to follow me.  At first he resisted, pulling back and giving me the most heartwrenching look imaginable.  You would think that I was asking him to walk the plank, but after I clucked and gave him my most willful expression he walked forward and climbed into the trailer with all four feet.

"What a Good, Good Boy, Harley.  That's it.  That's all I wanted."

Realizing that he had finally achieved my request, Harley looked relieved and softened his expression, although he also realized that this "wrong trailer" lacked a hay cradle and curbed his salivation and chewing.  I, too, was relieved until I realized that I had to back Harley down the step to get him out of the trailer.  I had just completely failed at explaining to him that he needed to step up with his hind legs.  How on Earth was I going to explain to him that he needed to step down?  He was barely able to absorb the first lesson and now he was going to be hit with another that would potentially be more alarming and even dangerous.  What if he moved too quickly and fell backward?

I decided to stay in the trailer a little longer, so that he could rest and remember the good step up he had just accomplished.  I needed to muster the confidence to back him off the trailer.  I heard one of the barn owners asking where Harley went.  The other answered that he was in the trailer.  Time to go, Harley.  We are being missed.

Very cautiously, I walked him backwards.  As we approached the step down I halted him and stroked his neck.  He looked at me innocently.  He had no idea.  To comfort myself, I told him in English that he was going to step down and that he must move slowly.  He calmly stepped back and found no ground beneath him as his hind leg and quarters dropped like a rock.  His ears darted back and he grimaced with bulging eyes.  His look screamed,

"WRROONNGG!!!!!"

Poor Harley.  I praised him and stroked his neck encouraging him to continue walking backward.  He obliged and finally licked and chewed, shaking his mane from side to side as we exited the dreadful trailer.  After a break, I walked with him onto the step-up trailer two more times.  By the second time, he was taking tiny, little baby steps backward until he found the edge of the trailer and then stepped down.  He still did not look happy, but at least he did not scare his socks off like the first time.  It will take some creative-thinking and practice for me to train him to float onto this trailer.  I am not sure that I even want him to free-load onto this trailer.

In the grand scheme of things, will the time and stress of training him to float onto the step-up be worthwhile?  Was Harley really confused or scared or were his theatrics a well-acted ploy?  Will he negotiate the step-up without a hitch (pun intended) if I fill the hay cradle?

What do you think?

*innocent face*


Speaking of Trailering: Need Some Advice or Tips?

Then stop by Karen's Dressage Blog, the story of a lifetime horsewomen switching gears from the Endurance World to the Dressage World.  As an endurance rider, Karen logged thousands of miles and hauled her horses to every event.  She regularly trailers her two beautiful horses to lessons and dressage shows, often completely on her own.  Since I do not own my own trailer and have never driven a truck pulling horses, I am extremely impressed by her expertise and resolve.  She is generously sharing her knowledge in a blog post series entitled "Trailering" where she discusses everything from safety to handy "gizmos" with lots of "how to".

Karen also regularly writes about the lovely grey Arabian, Speedy, and the tall, dark, and handsome New Zealand Thoroughbred, Sydney, as they explore the discipline of dressage in lessons, shows, and at home.

Saturday, October 29, 2011

Fifteen Minutes with a Dressage Judge

"Would you like to play a game?"

This is what the judge asked me after my second test.  To say that I did not know how to react would be an understatement.  I decided to answer safely,

"That depends upon the game, I guess."  I smiled hoping that I was going to like what she said next and silently questioned my decision to once again subject myself to judgment.

You see, I have learned to take what judges say with a grain of salt, especially when I am riding Harley.  One time I had a judge tell me that I should ride my horse like I was carrying a cinder block and I had to lift the cinder block up in each stride.  Seriously?  I do not want to ride that way.  Another judge told me that my horse was too fast (which was true) and then the very next judge told me that my horse was too slow (That was at the next show and was also true, but talk about frustrating!).  I also had a judge compliment my saddle up and down, only to learn a few short weeks later that that same saddle did not fit Harley (or me) and was seriously compromising our balance, communication, and comfort.  That saddle has been sold, by the way!  I have never had a judge speak to me in an outright mean-spirited or punitive manner, but I have sensed condescension in the past.  The judge that made me feel like a loser with a capital "L" never really said anything nasty, it was the way she gave her comments.  Thankfully, my husband was able to do some emotional triage and help me to a place where I could find some usefulness in the experience.

With my permission, the judge walked up to us and greeted my horse.  Harley was his usual curious, social self, pricking his ears at her and sniffing her sweater.  She told me that at First Level, there are a couple things that she wants to see from the horse and rider.  The ten meter figure-eights are in the First Level tests for a reason.  Those movements allow her to see if the rider has been taught how to balance her horse through small turns and a change of direction.  She said that if those movements are ridden the way they were intended to be ridden, the figure-eight looks like butter.

Let me back up for a moment.

The tip that she was about to give us was not the first piece advice we had received from her.  After our first test, she told me that she wanted to see the horse go with a higher poll.  I was actually pretty surprised to hear her say this.  I thought that First Level required the horse to be on the bit in a level frame and that "thrust" was the new quality of focus with the idea that those were two crucial pieces of the puzzle that would lead to collection at Second Level.  I had this in mind when I rode for the judge, trying to do my best to show that Harley could produce lots of pushing power even if he did not have huge, lofty gaits.  I also purposefully, allowed him to drop a little in front during the lengthenings by giving my hands forward (and apparently dislodging my seat).  Before the dressage show, I read a Jane Savoie article that explained the difference between lengthened gaits and medium gaits.  Lengthened gaits, which are requested at First Level only, ask the horse to increase his stride length, but do not require an uphill carriage.  Ms. Savoie even wrote that the rider may feel more in the hand as the balance goes forward for the lengthening, whereas the medium gaits should still possess a sense of collection allowing the horse to remain light in the hand as he increases his stride length.  Both movements should not be accompanied by an increase in tempo.  However, in practice I find this to be very, very difficult to accomplish.

So what was the judge's tip about raising the poll and maintaining balance in the lengthenings? 

I must control "space and time". 

In case you have not read my profile, I am a science teacher.  Oh dear.  She is telling me to defy physics.  Dressage is way more difficult than I ever imagined.  Dressage is physically impossible!

After she got past my nervous laughter, she told me that she knew exactly what I needed to do differently and that these were things that she "knew I could do".  First of all, I needed to project through my chest more.  She demonstrated by assuming a dressage rider position from the ground.  She did not say the my position was horrible or wrong, but that she wanted me to ride more like a proud rider.  If I projected more from my chest, my horse would do the same.  I also needed to keep my seat in contact with the saddle as I projected, so that I was "creating a space" for my horse to fill in front of me.  She used a beach ball analogy.  She wanted me to roll the bottom of the beach fall forward and rest it against my chest without leaning back.  (She was not telling me anything that I had not heard before, but let's face it.  I do not have regular lessons, so I am not receiving regular coaching.  Self video review has its limitations!)  Next, she told me to keep my seat in contact with the saddle more and to tuck my seatbones under my body.  This would help Harley keep his hindlegs underneath his center of gravity.  The horse was my mirror.  (Oops.  I was assuming the hunter position from my first years of riding.  No matter how many "belly-button" rides I do, that will always be a positional error that I must battle.) 

She gave me space.  So how do I control time, Madam Judge?

She told me to count.  She said that hunter/jumpers count to a fence, dressage riders should count for a lengthening.  Now that was some new information for me.  Dressage is a ballet, with a slow tempo and steady rhythm.  She told me to count before and after the lengthening and during the lengthening she wanted me to stand a little taller and sit a little stronger giving a squeeze with both legs.  She wanted me to control the tempo (time) with my body and create space by opening my chest.  At all costs, do not think "fast" or "strong".  Instead think "tall" and "slow".  Then she told me to go out there and competitively "beat myself" in the next test.  Her advice was dually noted and I thanked her wholeheartedly. 

I found the judge's advice about lengthenings to be profoundly helpful.  I felt a noticeable difference in Harley in the next test.  The diagonal felt like it took a lot longer and although I did not feel a huge difference in stride length, it did feel like we were taller and the downward transition to working trot or canter was easier.  Lengthenings are probably the weakest area in my education.  My original instructor did not really teach me how to lengthen, because both horses pretty much just did it already.  I pushed a little with my seat or squeezed a little more with my legs and they just went, especially the warmblood/TB mare.  I had to purposefully ride the canter lengthening at half-steam or she would end up in the next county.  It was not like we were scoring 8 and 9's, but I did receive a score of "7" with the words "conservative" written next to the movement.  I preferred "7 and still in the ring" to "8 and disqualified".  She was a strong mare.

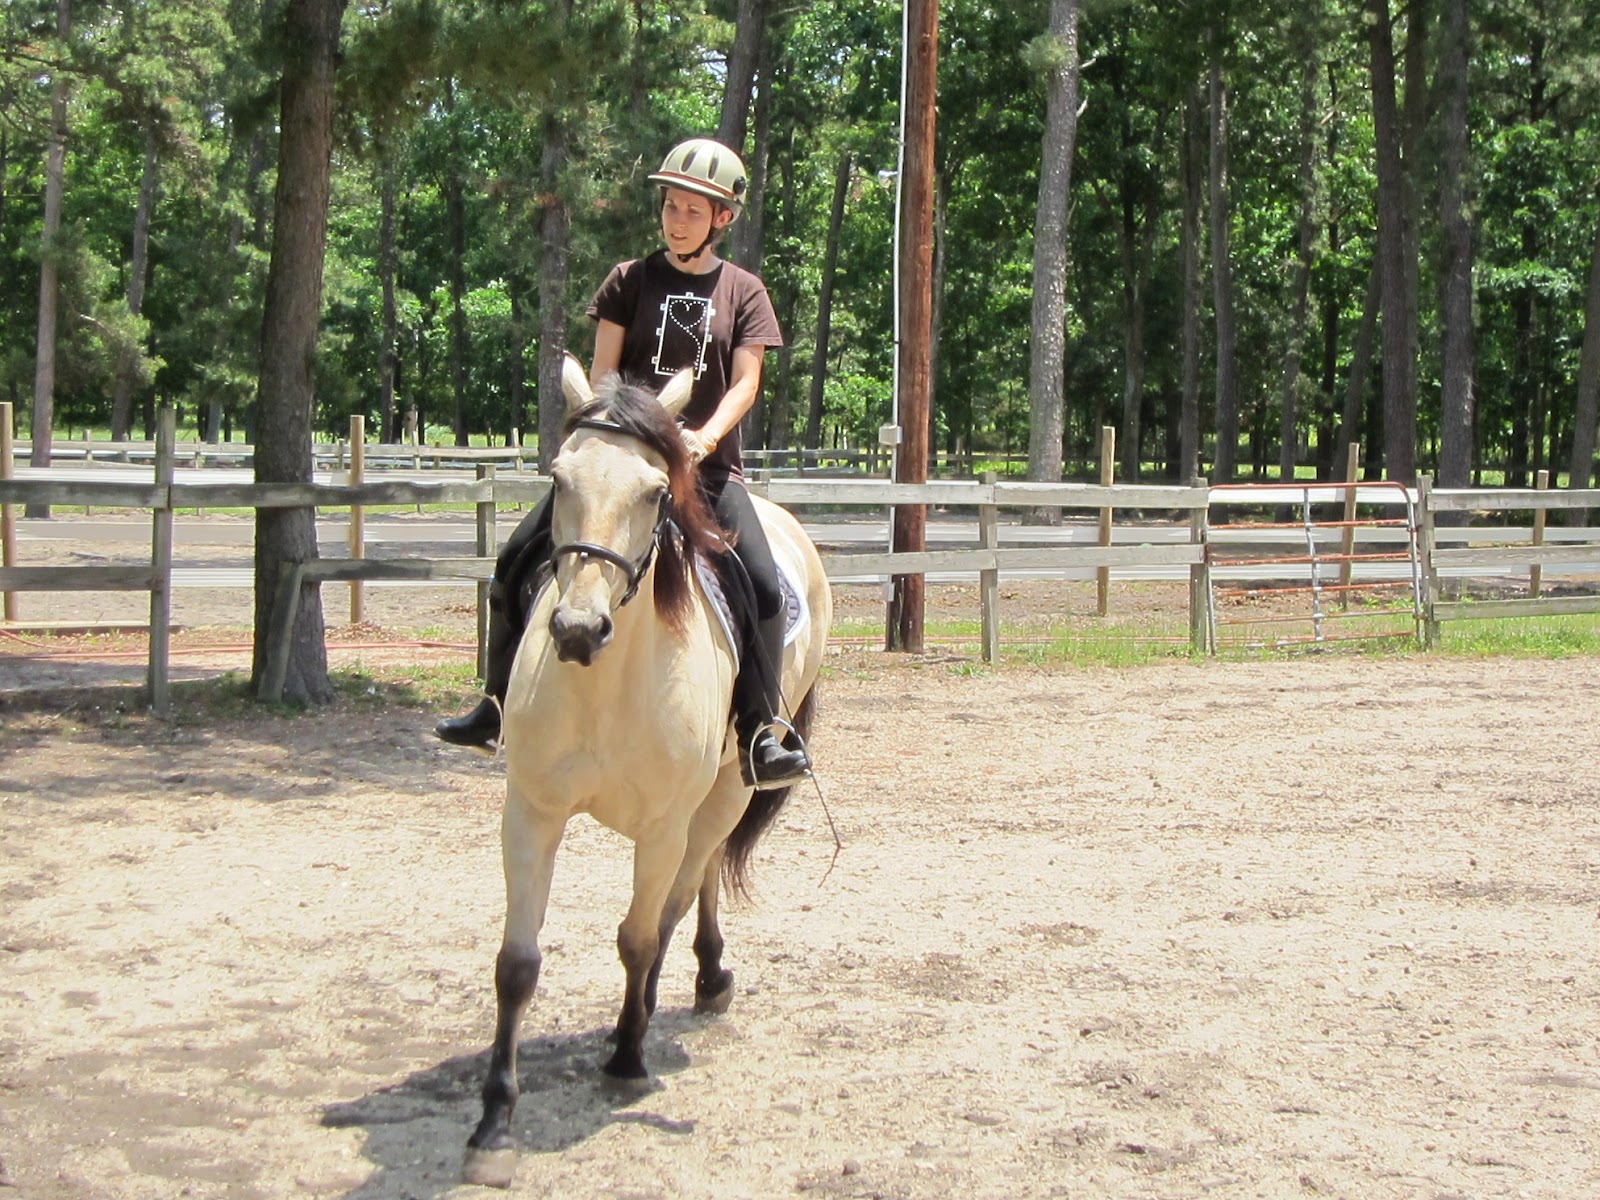
A canter lengthening from First Level test 1.  This is arguably Harley's favorite dressage movement!

A canter lengthening from First Level test 3.  There is a noticeable difference in my position and Harley's balance.  He looks a little flat compared to the first test, but we were also getting tired and his canter left was very crooked in this test.  Maybe this is how he should look?  I am not sure and there are so many variables!
 
A trot lengthening from First Level test 1.  I am quite happy with the way this looks, despite the suggested improvements.
 
I can see that my chest has come forward and that I am giving the reins forward a lot.  Got to love Harley's reach though!

Trot lengthening from First Level test 3.  Look Mom!  I am creating space and time!

Like in the test 3 canter lengthenings, I can see improvements in our balance here even if the reach is not as impressive.  I suppose that balance should predispose reach, which may improve as we practice a more correct lengthening technique.

Oh and one more thing, before I move on.  She told me that I am too straight in the saddle.  Me?  Not crooked?  Thank you, thank you!  I have permission to turn my upper body in the corners and turns.  As my teacher says, rotation, rotation, rotation, but she usually has me rotating to the outside, so that I do not collapse to the inside.  I will be careful not to over do it, but, praise the stars, I am straight in the saddle!

Okay, okay.  Back to our post-show one-on-one time and buttery figure-eights.

The judge asked me to ride a ten meter circle around her and began with a question.

"Do you know what I mean when I ask you to connect your outside arm to your body?"

Okay, this sounds like my teacher.  She is a Connected Riding instructor so I hear that word a lot.  I tried to demonstrate what I thought she meant, but I must not have succeeded, because she repeated her question.  She wanted my answer in words.

"Bend my outside elbow and pull my elbow back to my side."  I felt like this was right out of the dressage rider handbook.  I do not like it when students give me verbatin definitions.  My students do that when they do not want to be wrong.  Now, I was doing the same and she was equally unsatisfied with my bland answer.

"No.  I do not want you to do anything different with your elbow or the reins.  I want you to glue your outside arm to your side."

I kept Harley walking, but I turned to look at her.  What did you say?  She had my attention.

She told me to imagine that I had a tack store catalog with a $500 gift certificate sandwiched in the pages.  I had to hold the catalog and the money in between my outside upper arm and my ribcage.  She asked me to demonstrate how I would hold such a treasure.  I immediately clamped my arm to my side.

"Bingo.  Now continue walking on the circle, allow your inside rein and arm to be soft, but keep your outside arm very connected to your body.  You should feel this connection down to your outside seat bone."

I did.  Harley moved around the little circle with a lovely bend, light energetic steps, and a higher poll.  I used my legs to encourage him to continue stepping from behind, but otherwise he was totally "on parole".

Teacher, teacher.  I get it now!  I felt like my students.

Before moving into trot, she asked me to do a little experiment.  She told me to slightly press my weight into my inside stirrup and seat bone.  Harley's inside shoulder immediately shifted to the inside and he halted.  I think that she was surprised that he actually stopped.  She expected him to lose the bend, but I do not think she knew that this was going to be a wall for him.  My teacher finds this quality of Harley to be very amusing for instructional purposes and tells me that he does not "cut me many breaks" because of it.  The importance of weighting the outside stirrup in turns, in the canter transitions, even in half-pass is something that I have begun to preach when given the opportunity.  Now, she was really speaking my language.

After repositioning ourselves, she told me not to change a thing and ask Harley to trot.  This was tough.  I was so used to letting go too much.  Harley was used to popping off the contact and getting wiggly to avoid stepping through.  I just wrote about this a few posts ago.  When Harley is all connected and impulsive, he is amazing, but getting him there is challenging for two reasons: dressage is challenging by design and I do not want to hurt, upset, anger, frighten, or otherwise piss off my horse.  I love him and I want him to love me, even when carrots are not in the picture.

With some persistence and a few forceful taps with my legs, Harley pushed into trot.  I definitely had to remain active with my legs, but I was rewarded with this lovely, little, light trot.  Harley's neck was softly arched with a higher elevation than before, but he did not feel tight or restricted.  In fact, he had room to move his nose forward and I could feel him chew the bit.  The judge instructed me to correct him only with my legs if he tightened or tried to break gait.  She did not want me to use my reins to ask him to soften.  She told me that if I had the energy moving solidly from behind that it did not matter what his head and neck were doing, they would be in the right place.  She warned that the horse can switch very quickly from back to front to front to back.  She observed this in our lengthenings.  She said that one of our best moments in our second test was the canter lengthening (There is my answer for the earlier photo!), but my horse switched to front-back in the downward transition.  I must pay special attention to this and keep my legs active even in downward transitions.


She was nodding her head in approval before we finished our first circle.  This was the trot that she wanted to see for First Level.  All that I had to do to complete a nice figure-eight was to smoothly pass the catalog from one arm to the other, giving Harley a clear outside boundary and a connection to my seat in the new direction.  I told her that I could feel the difference.  And you know what?  It was not that hard to do.  Except for the lack of a whip to help my tired legs, riding Harley in this way actually felt easier.  He was softly in the bridle and light in front, and I could feel his hind legs lifting us up from behind the saddle.  The tempo was SLOW.  This was a relief to me.  I think that I was suffering from big-mover-envy.  I was actively trying to push Harley into a bigger stride for most of the test, hoping to squeeze out an extra inch.  This compromised our balance, our harmony, my position, and our overall performance.  This judge gave us permission to adopt a slower tempo without feeling inadequate.  This is not the first time that I have been told to "slow down", but it is the first time that someone showed me what a correct, slow trot should look and feel like in dressage.

Thank you for this wonderful, educational opportunity Madam Judge!  My goal in this post is to be your mirror, and reflect your kind gesture to a Sunday afternoon competitor whom you had never met before.

If you return to our area for an open dressage clinic, Harley and I will be there with an imaginary catalog tucked under my arm and with bells on!

Madam Judge engaged us in conversation as soon as we finished our salute.

The scribe was also very encouraging and personable.  It was my pleasure to ride and speak with both of them.